DIY vs. Professional — Side by Side
| Factor | DIY Kit | Professional |
|---|---|---|
| Surface Prep | Acid etching (chemical clean) | Diamond grinding (mechanical profile) |
| Coating Thickness | 2–5 mils (thin) | 10–20+ mils (4–10x thicker) |
| Coat System | 1 coat (body only) | 3 coats (primer + body + topcoat) |
| UV Protection | None — yellows within 1–2 years | UV-resistant topcoat included |
| Hot Tire Resistance | Fails — softens at tire temperature | Engineered for thermal cycling |
| Cost (2-car garage) | $50–$150 | $1,500–$3,500 |
| Lifespan | 1–3 years (70% fail in 2) | 10–30 years |
| 10-Year Total Cost | $2,500–$5,000+ (multiple re-dos) | $1,500–$3,500 (one and done) |
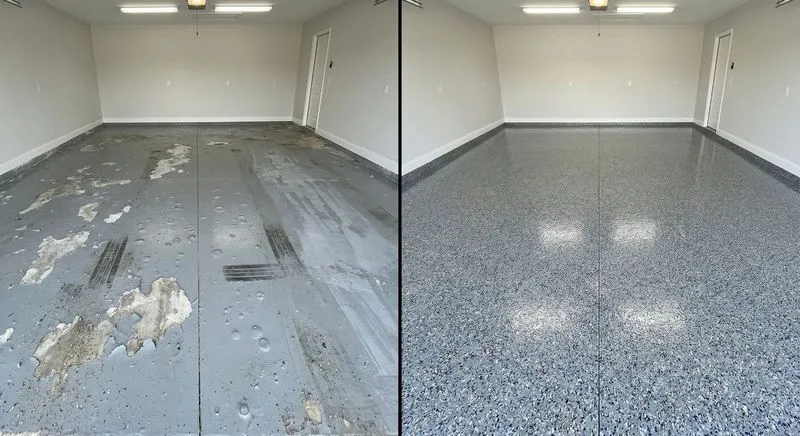
The 70% Failure Rate
Approximately 70% of DIY epoxy floor coatings fail within two years. This isn't a scare tactic — it's the reality our repair team deals with every week, and the pattern is remarkably consistent.
The failure modes include peeling (the coating separates from concrete in sheets, usually starting at edges and high-traffic areas), hot tire pickup (tire heat softens the thin coating and literally pulls it off when you drive away), bubbling (moisture trapped beneath the coating pushes it up from below), yellowing (UV degradation turns white and light-colored floors amber within months), and premature wear-through (thin single-coat systems grind down to bare concrete under normal traffic).
Every one of these failures traces back to two root causes: inadequate surface preparation and inferior materials. Fix those two things, and epoxy becomes one of the most durable flooring options available. Skip them — as every DIY kit does — and failure is nearly guaranteed.
Ready to transform your space?
Get a free, no-obligation quote from your local Ascent Epoxy team.
Get a Free Quote
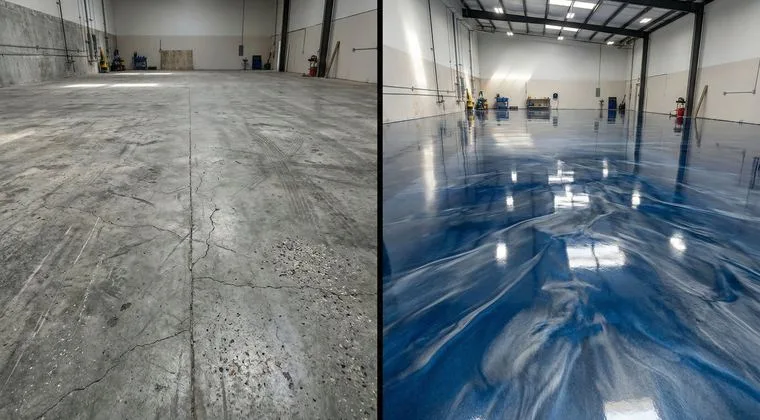
Surface Preparation: The Critical Difference
The single most important difference between professional and DIY epoxy installation is surface preparation — specifically, how the concrete is profiled before the coating is applied.
DIY kits include acid etching solution — a chemical that cleans the concrete surface and opens some pores. What acid etching doesn't do is create a deep mechanical profile. The concrete surface looks clean after etching, but it's still too smooth for permanent adhesion. It's like trying to glue wallpaper to a smooth painted wall — it sticks initially, then peels once stress is applied.
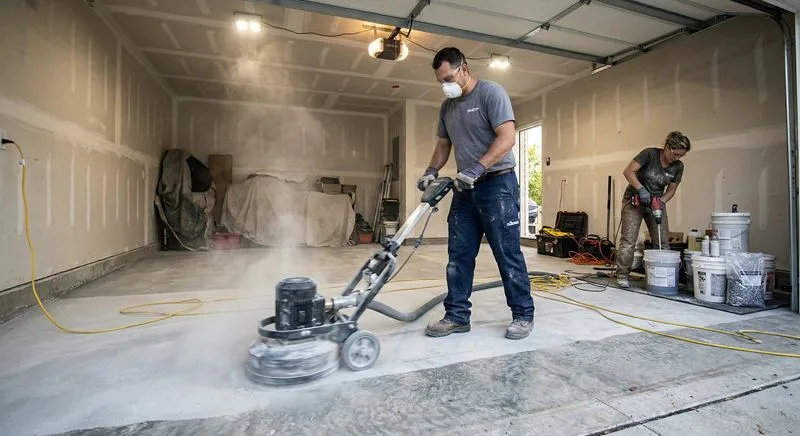
Professional installations use diamond grinding or shot blasting — mechanical processes that physically abrade the concrete to a specific roughness called CSP (Concrete Surface Profile) level 2–3. Industrial diamond grinders remove a thin layer of the concrete surface, exposing fresh aggregate and creating thousands of microscopic "teeth" per square inch. The epoxy flows into these teeth and locks in permanently — a mechanical bond that can never separate under normal conditions.
The difference is invisible after coating. Both a DIY acid-etched floor and a professionally ground floor look identical on installation day. The failure only reveals itself months later when the acid-etched coating begins to peel. By then, the homeowner has a bigger problem: removing the failed coating is harder and more expensive than the original installation would have been.
Materials: The 4–10x Thickness Gap
DIY kits from hardware stores use water-based or low-solids epoxy applied at 2–5 mils dry film thickness. Professional systems use 100% solids or high-solids epoxy applied at 10–20+ mils — a 4 to 10 times difference in coating thickness that directly determines impact resistance, chemical resistance, abrasion resistance, and lifespan.
To visualize this: a DIY coating is about as thick as 2–3 sheets of copy paper. A professional coating is as thick as a credit card. That difference matters when a wrench drops from a workbench, when road salt gets dragged across the surface all winter, when hot engine oil drips and sits overnight, or when 3,000-pound vehicles park on it daily for a decade.
Beyond thickness, professional systems use a three-coat architecture — each layer serving a distinct function. The primer penetrates concrete pores and creates a chemical bond to the substrate. The body coat provides thickness, color, and decorative elements (flake, metallic, quartz). The topcoat is a clear, UV-stable protective layer that prevents yellowing, adds chemical resistance, and provides the final gloss or matte sheen. DIY kits combine all of these functions into a single thin layer — which means none of them is performed well.
The Hot Tire Test
Hot tire pickup is the #1 complaint about DIY garage epoxy — and the failure that frustrates homeowners most, because it happens gradually and unpredictably.
When you park a car after driving, tire temperatures can reach 150–200°F from road friction and braking heat. When those hot tires sit on a thin DIY epoxy coating, the heat softens the coating to a tacky state. When you drive away the next morning, the cooled rubber has bonded to the softened epoxy — and it pulls the coating right off the concrete in tire-shaped patches.
This cycle worsens with each drive. The first time, you might notice slight marks. By the tenth or twentieth cycle, chunks of coating are missing. Within 6–12 months, the tire paths are bare concrete while the rest of the floor still looks coated — the worst possible visual outcome.
Professional systems prevent this entirely through two mechanisms: heat-resistant primer formulations that maintain their bond at elevated temperatures, and coating thickness that distributes and dissipates heat before it reaches the adhesion layer. A 15-mil professional coating handles 200°F tire contact without softening. A 3-mil DIY coating cannot. See our garage epoxy systems engineered for hot tire performance.
Ready to Do It Right?
Get a professional quote — detailed, no-obligation, within 24 hours.
Get a Free Quote (954) 852-1263The Real Cost Math
A DIY kit costs $50–$150 for a 2-car garage. Professional garage epoxy installation costs $1,500–$3,500 for the same space. On the surface, that's a 10–25x price difference. But the real cost comparison requires looking beyond day one.
When 70% of DIY jobs fail within 2 years, most homeowners face a choice: live with a peeling, ugly floor, or pay for professional remediation. Professional remediation of a failed DIY job costs MORE than a fresh professional install — typically 15–25% more — because the failed coating must be fully removed before new coating can be applied. Removing old epoxy adds $1–$3 per square foot in additional grinding time.
Here's the 10-year cost comparison for a 450 sq ft garage:
- Scenario A: Professional installation. $2,500 upfront. Zero additional costs over 10 years. Total: $2,500.
- Scenario B: DIY attempt → failure → professional redo. $100 DIY kit + $3,000 professional remediation (removal + fresh install). Total: $3,100.
- Scenario C: DIY attempt → failure → second DIY attempt → failure → professional redo. $100 + $100 + $3,500 (double removal). Total: $3,700.
The "cheap" option ends up costing 24–48% more than doing it right the first time. And you've spent 2–4 years looking at a failing floor in the meantime. See our complete pricing guide for all project types.
What Professional Installation Actually Includes
For $1,500–$3,500 on a standard 2-car garage, here's exactly what you get — and what a $100 DIY kit doesn't include:
- Concrete inspection and moisture testing — identifying hidden problems before they become coating failures
- Diamond grinding with HEPA dust extraction — the critical prep step that determines adhesion quality
- Professional crack and joint repair — creating a smooth, even substrate
- Three-coat system — primer + body coat with your chosen finish + UV-resistant topcoat (10–20+ mils total)
- Decorative finish options — flake, metallic, quartz, or solid color applied by trained technicians
- Full cleanup — grinding dust, materials, and equipment removed
- Cure guidance — specific timeline for when you can walk, move furniture, and park vehicles
- Quality guarantee — backed by the Ascent Epoxy quality guarantee
A DIY kit includes: one can of epoxy, one bag of acid etch, decorative flakes (optional), and an instruction sheet. No grinding, no primer, no topcoat, no crack repair, no moisture testing, no guarantee. See the full professional installation process step by step.
When DIY Can Actually Work
In the interest of honesty, there are situations where DIY epoxy is acceptable — as long as you understand the trade-offs and set realistic expectations:
Workshop floors that never see vehicles. Without hot tires, the #1 failure mode is eliminated. A workshop that only handles foot traffic and light tool drops can get 3–5 years from a quality 2-part DIY epoxy — especially if you rent a concrete grinder instead of relying on acid etching.
Storage areas and utility spaces. If appearance doesn't matter and you're comfortable re-doing the floor every 2–3 years, a $100 DIY kit is a reasonable temporary solution for a storage shed, unfinished utility room, or rarely used space.
Temporary protection. If you're planning to sell a home within 1–2 years and want the garage to look better for listing photos, a DIY coating that lasts 12–18 months might serve the purpose — though a professional installation would add significantly more resale value ($5,000–$10,000 by industry estimates).
If you do choose DIY: invest in a quality 2-part epoxy (not water-based single-part kits), rent a concrete grinder from a tool rental company ($150–$250/day) instead of relying on acid etching, test for moisture before applying, and follow temperature and humidity requirements precisely.
When Professional Installation Is Worth Every Dollar
Professional installation is worth the investment for any floor that will see vehicle traffic, decorative finishes, or daily use beyond 3 years. Specifically:
The floor will see vehicles. Hot tire resistance requires specific primer formulations and coating thickness that DIY products don't offer. If cars will park on it, go professional.
You want it to last beyond 3 years. Professional epoxy lasts 10–30 years. DIY lasts 1–3. If you plan to be in the home for more than a few years, the one-time professional investment pays for itself.
You want decorative finishes. Metallic manipulation, even flake broadcasting, and quartz application all require trained technique. These finishes are impossible to execute well without experience — and a botched metallic floor is worse than bare concrete.
The space is a living area. Your basement, kitchen, or living room floor is something you see and walk on every day. A visible failure isn't just a maintenance issue — it's a daily frustration and an eyesore you can't ignore.
The project cost makes re-doing it painful. A $2,500 garage floor that fails means spending $3,000+ on remediation. A $5,000 basement floor that fails means spending $6,000+. The higher the stakes, the more professional installation is worth it. Get a free professional quote — no obligation.
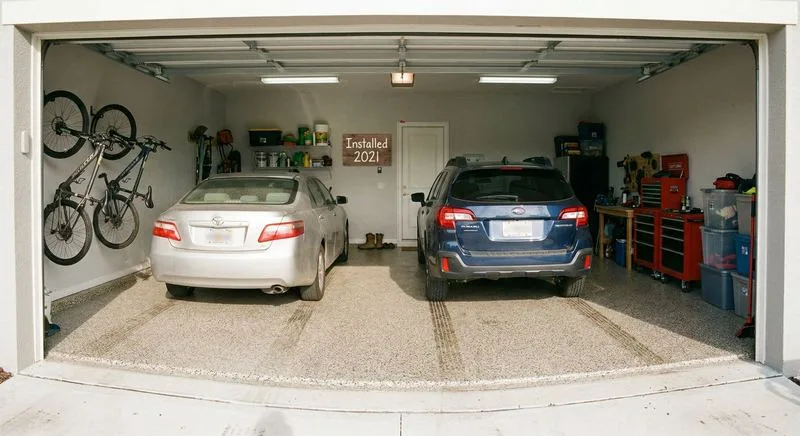
See what professional epoxy looks like after years of daily use.
How to Fix a Failed DIY Job
If your DIY epoxy is peeling, bubbling, or lifting — don't try to patch it. Applying new coating over failed coating is like painting over peeling paint: the underlying adhesion problem means the new layer will fail too, usually faster than the first.
The correct solution is professional remediation, which follows this process:
- Full removal. The failed coating is completely removed using aggressive diamond grinding — the same equipment used for new installations, but with coarser tooling to strip the old material down to bare concrete.
- Surface inspection. With the concrete exposed, the team assesses the underlying condition — moisture issues, structural cracks, or adhesion-resistant areas that caused the original failure.
- Proper preparation. The bare concrete is diamond ground to CSP 2–3 profile, exactly as it would be for a new installation. Cracks and joints are repaired.
- Professional coating. A full three-coat system (primer, body, topcoat) is applied using the same process and materials as any new professional installation.
The result is a floor that's indistinguishable from a first-time professional install — and will last 10–30 years. The additional cost over a standard installation is typically 15–25% (the removal step), which for a 2-car garage adds roughly $400–$800 to the project price.
Our team remediates failed DIY projects regularly — it's one of our most common service requests. There's no judgment; we understand the appeal of saving money. The important thing is getting it done right, whether it's your first attempt or your third. Learn about our repair and remediation services.