Before Installation Day
Professional epoxy installation follows five steps — inspection, surface preparation, crack repair, coating application, and curing — typically completed in 1–2 days for residential projects. But the process actually starts before the crew arrives, with your preparation of the space.
The floor area must be completely clear. For garages, remove all vehicles, storage bins, tools, shelving units, and wall-mounted items below 4 feet (grinding creates fine dust that settles on everything nearby). For interior rooms, clear all furniture, appliances, and rugs. Most homeowners need 1–2 hours to clear a garage and 30–60 minutes per interior room.
Beyond clearing the space, make sure the crew has access to a power outlet (grinders draw significant amperage) and water (for dust suppression if needed). If you have pets, arrange for them to be in a separate area during installation — the noise from grinding can be stressful, and wet epoxy is harmful if walked through. Most projects can be scheduled within 2 weeks of your consultation, so plan your preparation around that timeline. Schedule your free consultation to lock in a date.
Step 1: Inspection & Consultation
Every project begins with a thorough assessment of your concrete. The installer examines the surface for cracks, spalling, previous coatings or sealers, structural issues, and overall condition. Moisture levels are tested using professional-grade equipment (calcium chloride test or relative humidity probe) — high moisture is the #1 hidden cause of epoxy failure and must be addressed before coating.
Ready to transform your space?
Get a free, no-obligation quote from your local Ascent Epoxy team.
Get a Free QuoteDuring this phase, you'll finalize your finish selection from physical sample boards (not just photos — you need to see and feel the texture under your lighting conditions), confirm the color, review the detailed timeline, and receive a written quote. If we discover anything unexpected during inspection — moisture issues, deeper cracks than visible, or old coatings that need removal — we discuss it with you immediately. There are no surprise charges. The scope and price are locked in before any work begins.
For most residential projects, the on-site consultation takes 30–45 minutes. You'll leave with a clear understanding of exactly what will happen, when, and how much it costs. Schedule your free inspection.
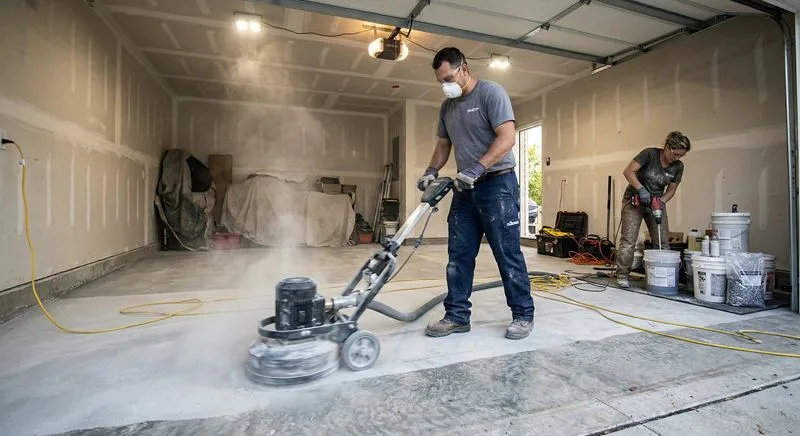
Step 2: Surface Preparation — The Most Critical Step
Surface preparation is the single most important factor in how long your epoxy will last. Without proper prep, even the best epoxy materials will fail — which is why this step gets more attention than any other in professional installations.
Professional crews use diamond grinding or shot blasting — mechanical processes that physically abrade the concrete surface to a specific roughness called CSP (Concrete Surface Profile) level 2–3. This creates thousands of microscopic "teeth" per square inch that the epoxy grips permanently. Think of it like sanding wood before staining — the rougher surface creates dramatically better adhesion.
This is the #1 difference between professional installations and DIY kits. Store-bought kits include acid etching — a chemical process that cleans the surface and opens some pores, but doesn't create the deep mechanical profile needed for lasting adhesion. The result: DIY epoxy looks great for 6 months, then starts peeling. Professional epoxy bonds permanently because the surface was properly profiled. See our full DIY vs. professional comparison.
The grinding process generates concrete dust, but professional crews use industrial vacuum systems attached directly to the grinder. These HEPA-filtered dust extractors capture 95%+ of particles at the source. Your garage or room stays remarkably clean throughout — a far cry from the dusty mess of rental grinder DIY attempts.
Surface prep typically takes 2–4 hours for a standard 2-car garage, depending on the concrete condition and any old coatings that need removal.
Step 3: Crack & Joint Repair
After grinding reveals the bare concrete profile, the crew addresses every imperfection in the surface. All cracks, divots, spalls, control joints, and expansion joints are filled with professional-grade repair compound that bonds to both the concrete and the incoming epoxy.
Minor hairline cracks (common in all concrete) are quickly filled and leveled. Larger structural cracks — those wider than 1/4 inch or showing vertical displacement — may need deeper repair with flexible filler that accommodates future movement. The installer identifies these during the initial inspection so the scope is clear before work begins.
Control joints (the grooves cut into concrete to control cracking) can be filled for a completely seamless surface, or left visible as decorative lines — it's your choice. Most homeowners opt to fill them for the cleanest look. The filled joints become invisible under the epoxy coating. Learn about our repair and maintenance services.
Step 4: Epoxy Application
Professional epoxy is applied in three distinct layers — primer, body coat, and topcoat — each serving a critical function in the system's performance and longevity.
- Primer coat. A thin, penetrating layer that soaks into the prepared concrete pores and creates a chemical bond between the substrate and the body coat. The primer also seals any remaining micro-porosity and provides a consistent base for even color application. Typical dry time between primer and body coat: 4–8 hours, depending on temperature and humidity.
- Body coat. The main epoxy layer — this is what provides thickness, color, impact resistance, and chemical protection. For decorative finishes, this is the critical stage: flake chips are broadcast into the wet epoxy by hand (requiring trained technique for even distribution), quartz aggregate is applied for texture, or metallic pigments are manipulated with rollers and blowers to create flowing patterns. The body coat is typically 10–15 mils thick — 3 to 5 times thicker than DIY kits.
- Topcoat. A clear protective finish — typically polyurethane or a fast-cure alternative — that provides UV protection (preventing yellowing from sunlight exposure), additional chemical resistance, abrasion resistance, and the final sheen. You choose between high-gloss (mirror-like reflectivity), satin (subtle sheen), or matte (no shine) based on your aesthetic preference. The topcoat is what makes the floor easy to clean and gives it that "just installed" look for years.
Each layer requires specific dry time between applications. Rushing between coats — applying the body coat before the primer has fully tacked, or topcoating before the body coat has cured — causes inter-coat adhesion failure. This is another common DIY mistake that professional installers never make because they understand the chemistry and monitor conditions throughout the process.
Temperature and humidity affect cure times significantly. Most professional epoxies require ambient temperatures between 50°F and 90°F and relative humidity below 85%. Your installer schedules around weather conditions to ensure optimal curing. In conditioned interior spaces, this is rarely an issue. For garages, seasonal scheduling may apply — our team advises on the best timing during your consultation.
Get a Free Quote for Your Floor
Our team provides detailed, no-obligation quotes within 24 hours — including prep, materials, and installation timeline.
Get a Free Quote (954) 852-1263Step 5: Curing & Final Walkthrough
After the final topcoat is applied, the crew performs a detailed walkthrough with you to inspect the completed surface from multiple angles and lighting conditions, answer any questions, and provide specific care instructions for the curing period.
Curing happens in two phases. Initial cure makes the surface dry and firm enough for light contact — typically within 12–24 hours. Full cure is the chemical cross-linking process where the epoxy reaches its maximum hardness, chemical resistance, and abrasion resistance — this takes 5–7 days depending on the system and ambient conditions. During full cure, the floor gets progressively harder and more resistant each day.
Cure Timeline — What You Can Do When
How Long Does Installation Take?
Most residential epoxy projects complete in 1–2 days of on-site work, with full cure requiring 3–5 additional days before vehicles and heavy use. Here's what to expect by project type:
- Single-car garage (200–250 sq ft): 1 day on-site. The crew typically arrives in the morning, completes grinding and prep by midday, and applies the coating system by afternoon. You'll have your garage back (for foot traffic) the next day.
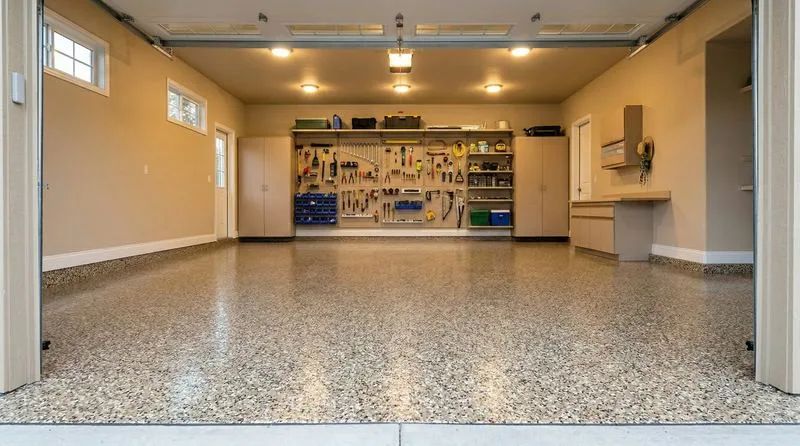
- Two-car garage (400–500 sq ft): 1–2 days. Larger surface area means more grinding time and potentially an overnight between primer and body coat for optimal adhesion. Our most popular service — see garage options.
- Three-car garage (600–750 sq ft): 2 days. The additional area requires a full second day for proper multi-coat application.
- Residential room (200–500 sq ft): 1–2 days. Interior rooms may require additional ventilation setup and dust containment barriers to protect adjacent rooms.
- Commercial space (2,000–10,000 sq ft): 3–5 days. Larger crews and phased scheduling for occupied buildings. See commercial solutions.
- Industrial facility (10,000+ sq ft): 5–10+ days depending on system complexity and operational scheduling requirements.
These timelines assume standard concrete in reasonable condition. Floors requiring extensive old coating removal, deep crack repair, or moisture mitigation may add 1 day to the schedule — identified during consultation so you can plan accordingly.
Seasonal factors also affect scheduling. Epoxy cures best between 50°F and 90°F with moderate humidity. In northern climates, garage installations are best scheduled in spring through fall. In southern climates, year-round installation is typical. Your installer recommends the optimal timing during consultation.
Post-Installation: Care During Cure
The curing period is the only time your epoxy floor requires special attention. After full cure, maintenance is nearly effortless — but during the first week, following the cure timeline above protects your investment.
Keep the space clean during cure: sweep gently if dust settles, but avoid mopping or wet cleaning for the first 72 hours. Don't place rubber mats, cardboard boxes, or plastic directly on the surface during cure — these can trap moisture and affect the finish. Keep the space at normal room temperature if possible (don't turn off the heat in a garage during a winter cure).
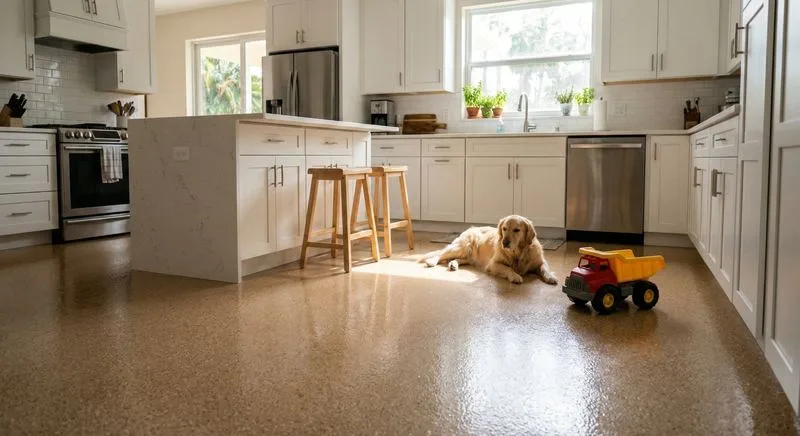
After full cure, your maintenance routine is simple: sweep or dust mop regularly to remove grit (which acts as sandpaper under foot traffic), and mop occasionally with warm water and a mild pH-neutral cleaner. No waxing, no sealing, no special treatments. For garages, a hose-down removes tire marks and road salt in minutes. Learn about residential floor care. Read our complete epoxy maintenance guide.
What to Ask Your Installer
Not all epoxy contractors follow the same process. Before hiring anyone, ask these four questions to ensure you're getting a professional-grade installation:
- "What surface preparation method do you use?" The answer should be diamond grinding or shot blasting. If they say "acid etching" or "we don't need to grind," walk away. Surface prep is the foundation of every successful epoxy installation.
- "How many coats does your system include?" Professional systems are multi-coat: primer + body coat + topcoat, totaling 10–20+ mils of dry film thickness. One-coat or two-coat systems are thinner and less durable. Ask for the total DFT (dry film thickness) in mils.
- "What type of topcoat do you use?" UV-resistant topcoats prevent yellowing and add chemical protection. If there's no clear topcoat, the floor will dull and discolor within 1–2 years — especially in garages with sunlight exposure.
- "What's included in your price?" The quote should cover everything: inspection, grinding, crack repair, all coating layers, cleanup, and a written timeline. If prep, crack repair, or topcoat are listed as separate add-ons, the "low" base price is misleading. See what should be included in every professional quote.
At Ascent Epoxy, we welcome these questions — because our process and pricing are built to answer every one of them with confidence. Schedule your free consultation today.