Why Epoxy Is Ideal for Home Gyms
Epoxy flooring handles the unique demands of a home gym better than bare concrete, rubber tiles, or foam mats alone. It creates a seamless, moisture-resistant surface that won't harbor bacteria or sweat odors — a critical factor in a space that generates significant moisture during every session.
Bare concrete absorbs sweat, develops permanent stains, and creates dust that aggravates breathing during cardio. Interlocking rubber tiles shift under heavy loads, trap moisture at seams, and develop odor over time. Foam mats compress under equipment weight and need frequent replacement. Epoxy solves all of these problems: it seals the concrete completely, creating a non-porous surface that cleans with a simple mop, supports any weight without compression, and lasts 10–30 years without replacement.
The combination most commercial gym owners use — epoxy as the base surface with rubber stall mats in the lifting zones — gives you the best of both worlds: a clean, sealed, easy-to-maintain floor everywhere, plus dedicated impact absorption where weights get dropped. Learn about residential epoxy options.
Best Finishes for Gym Floors
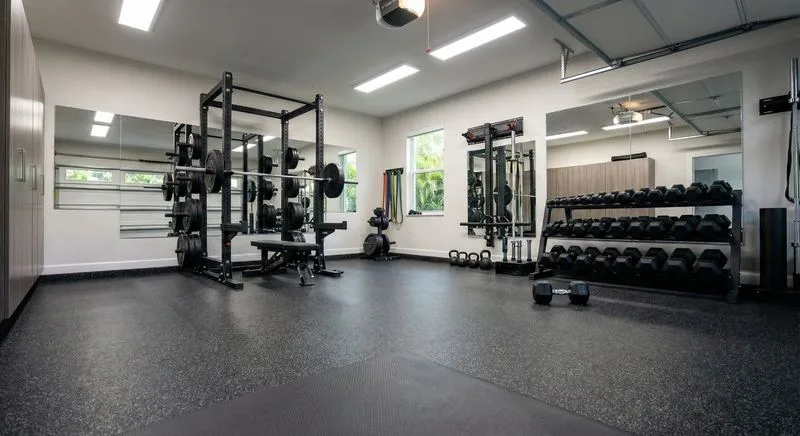
Decorative flake is our #1 recommendation for home gyms. The vinyl chips create natural texture for grip without being rough on bare feet, the multi-toned pattern hides scuff marks, equipment drag marks, and rubber mat impressions, and it's the most cost-effective professional finish at $4–$7 per square foot.
Ready to transform your space?
Get a free, no-obligation quote from your local Ascent Epoxy team.
Get a Free QuoteQuartz broadcast is the premium gym choice — offering the highest slip resistance available. The quartz granules provide aggressive texture that grips shoes even when the floor is wet with sweat. It's what commercial CrossFit boxes and martial arts studios use. Cost: $6–$10/sq ft.
Solid-color epoxy delivers a clean, modern gym aesthetic at the lowest cost ($3–$5/sq ft). The smooth surface looks sleek but shows marks more readily than flake. Best paired with anti-slip additives mixed into the topcoat for grip. A popular choice for yoga and Pilates studios where the clean minimal look matters.
Metallic epoxy is stunning but typically too smooth for active training unless paired with a textured topcoat or anti-slip additive. Best reserved for gym areas that double as entertainment spaces — a finished basement that serves as both gym and lounge. See all finish options with photos and pricing.
Impact Resistance: Handling Dropped Weights
Professional epoxy systems at 10–20+ mils thickness absorb significant impact without chipping or cracking. For context, a 45-pound plate dropped from waist height onto an epoxy floor will bounce without damaging the coating. Dumbbells up to 50 pounds dropped from a rack cause no damage. The floor can handle squat racks, power cages, cable machines, and treadmills without compression marks or structural issues.
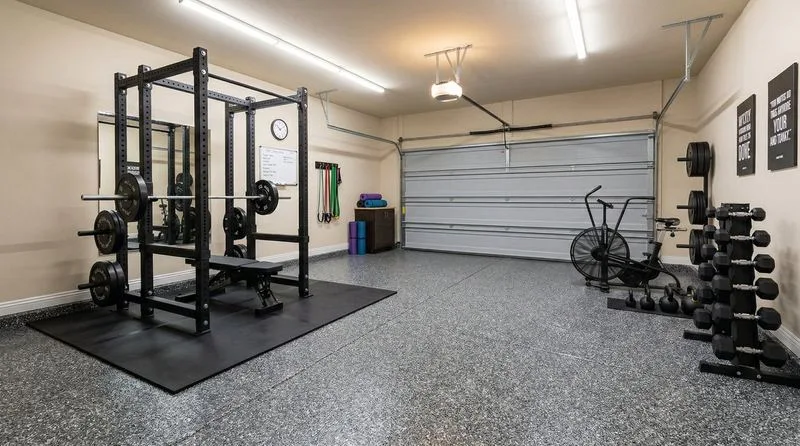
For serious lifters who regularly drop heavy barbells loaded to 200+ pounds (deadlifts, clean and jerk, snatch), we recommend the commercial gym combination: epoxy floor with 3/4-inch rubber stall mats (horse stall mats from farm supply stores work perfectly) in the lifting zone. The epoxy protects and seals the concrete everywhere, while the rubber mats absorb the acute impact of dropped barbells that would chip even the thickest epoxy.
The key insight: epoxy protects the FLOOR (concrete, moisture, bacteria, aesthetics), while rubber mats protect the floor FROM THE WEIGHTS. They serve different purposes and work best together. A garage gym with only rubber mats still has moisture problems, bacteria growth, and bare concrete at the edges. A garage gym with only epoxy handles everything except extreme weight drops. The combination handles everything.
Slip Resistance for Active Training
Gym floors need grip — especially during exercises involving lateral movement, jumping, box jumps, or lifting in socks or bare feet. The right epoxy finish provides this naturally.
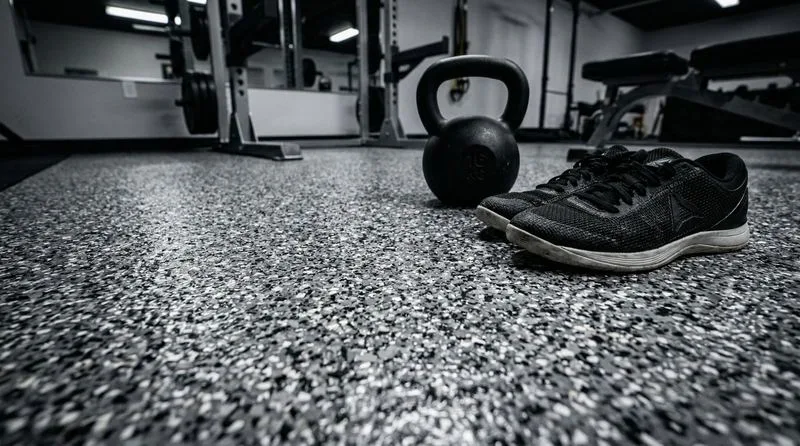
Flake and quartz finishes provide inherent texture from the chips and granules embedded in the surface. This texture grips shoe soles and bare feet without being rough or abrasive — you can do burpees, mountain climbers, and yoga transitions comfortably.
For additional slip resistance beyond what the finish provides, anti-slip additives can be mixed into the topcoat. Aluminum oxide particles or polymer beads create microscopic grip points invisible to the eye but highly effective underfoot. We calibrate the grip level based on your training style: lighter texture for general fitness and yoga, medium for functional training, and more aggressive texture for CrossFit-style and Olympic lifting spaces where maximum grip is essential.
One advantage of epoxy over bare concrete: epoxy's sealed surface actually provides MORE consistent grip than raw concrete. Bare concrete develops dusty patches (reducing grip) and smooth worn spots (from repeated foot traffic). Epoxy's uniform surface delivers the same grip everywhere, every time.
Ready to Build Your Dream Gym?
Get a free quote for your gym floor — we'll recommend the right finish and protection for your workout style.
Get a Free Quote (954) 852-1263Rubber Mat Compatibility
Rubber gym mats work exceptionally well on epoxy floors — better than on bare concrete, actually. The sealed, flat surface prevents moisture from getting trapped underneath the mats, which is the #1 cause of odor and concrete damage in garage gyms with bare concrete under rubber.
With bare concrete, sweat seeps through mat seams, absorbs into the porous concrete beneath, and creates a permanent moisture-bacteria cycle that's impossible to clean without removing the mats. With epoxy, any moisture that reaches the floor sits on the non-porous surface and evaporates or wipes away during your next cleaning. No absorption, no odor, no damage.
One caution worth knowing: dark rubber mats (especially cheaper ones) can leave temporary marks on light-colored epoxy through a process called plasticizer migration — chemicals in the rubber slowly leach onto the surface. These marks look alarming but aren't actual damage: they wipe off with commercial degreaser or mineral spirits. To avoid this entirely, choose a darker epoxy color (charcoal flake or dark gray solid), use higher-quality rubber mats with low plasticizer content, or place a thin vapor barrier between mat and floor.
Most gym owners choose a dark flake epoxy specifically because it's the most forgiving surface — hides rubber marks, hides chalk dust, hides equipment scuffs — while still looking great.
Best Epoxy Setup by Workout Type
Max grip for box jumps and snatches. Rubber mats where barbells drop. Anti-slip additive in topcoat.
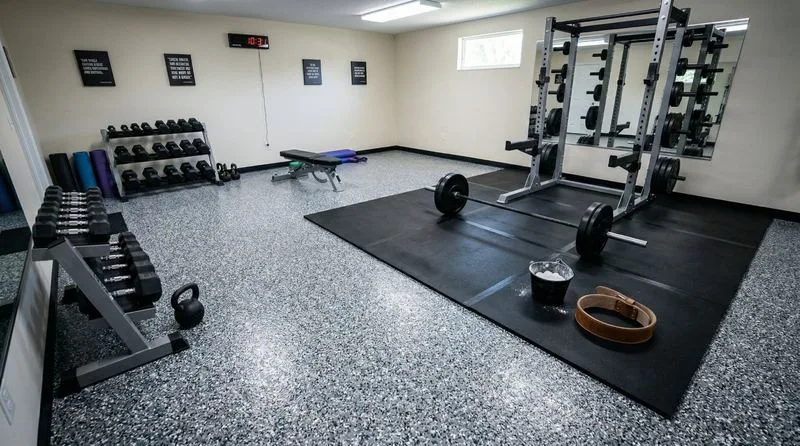
Epoxy seals and protects entire floor. 3/4" rubber stall mats under squat rack and deadlift platform.
Dumbbells, machines, cardio equipment — epoxy alone handles everything. Flake hides daily wear.
Clean minimal aesthetic. Gentle anti-slip additive for bare-foot grip. Warm tones for a calming space.
Maximum grip for footwork and lateral movement. Easy to clean sweat and blood. Seamless for mat placement.
Cost for Home Gym Floors
A typical home gym epoxy installation costs $1,500–$4,000 depending on size, location (garage vs. basement), and finish choice. Here's what to expect:
- Garage gym (400–500 sq ft, flake): $1,500–$3,500 — the most common home gym project
- Garage gym (400–500 sq ft, quartz): $2,400–$5,000 — premium slip resistance for serious training
- Basement gym (300–500 sq ft, flake): $2,000–$4,000 — may include moisture mitigation if needed
- Basement gym (300–500 sq ft, metallic): $3,000–$6,000 — premium finish for dual-use spaces
All prices include diamond grinding surface prep, crack repair, multi-coat system, and UV-resistant topcoat. The only variable that typically adds cost for gym conversions is existing concrete condition — old paint, sealer, or significant moisture require additional prep. This is identified during the free consultation so there are no surprises.
For budget-conscious gym builders: solid-color epoxy at $3–$5/sq ft delivers a clean, sealed surface for $1,200–$2,500 on a 400 sq ft garage. It's the least expensive professional option and handles everything except heavy barbell drops (add rubber mats for those areas). See our complete pricing guide with breakdowns by project type.
Planning Your Gym Floor
Plan your gym floor in zones — lifting, cardio, and open space — so the finish and protection level can be tailored to each area. Before scheduling installation, finalize these details:
Zone your layout first. Identify where the squat rack/power cage will go (rubber mats needed), where cardio equipment sits (epoxy alone is fine), where free weights live (rubber mats recommended for drops), and where open floor space is used for bodyweight work, stretching, or yoga (epoxy with anti-slip works perfectly). Share this layout during your consultation so we can recommend the right finish and placement.
Schedule installation before equipment arrives. Most gym floor installations complete in 1–2 days, with 5–7 days of cure time before heavy equipment can be placed. Plan your timeline: consultation → installation → 1-week cure → equipment delivery and setup. Trying to work around existing equipment makes installation harder and more expensive. See the full installation process and timeline.
Consider your garage's dual purpose. Many home gym garages still park vehicles. If you're keeping car parking alongside the gym, decorative flake is the ideal choice — it handles hot tires AND gym use equally well. The zones work: park on one side, train on the other, and the entire floor is protected by the same durable coating. See our garage epoxy options.